ciscn_2017_babydriver的几种解法
开始之前
最近在屁颠屁颠的学kernel pwn,跟着一些视频、博客搭建环境,学习调试内核。但感觉内核态的漏洞涉及了很多知识点,只能遇到啥去学啥了。
因此为了巩固每次新学习的知识点,我打算整理好记下来,同时录个视频加强自己的思维理解,当然如果能帮助到其他正在学习的小伙伴那就更好了。
驱动分析
ida打开驱动一看,有如下几个功能函数,其中babydriver_init和babydriver_exit函数是用于内核模块的初始化和退出。
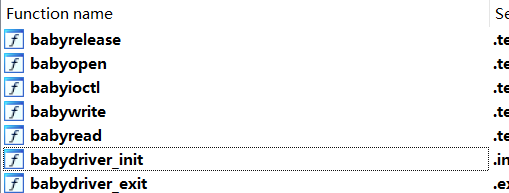
每个函数都过一遍,第一次看感觉好陌生,各种不认识的函数名,那不认识还能怎么办,一个一个查呗,多见几次就熟悉了。
babydriver_init
首先是babydriver_init函数,反汇编如下
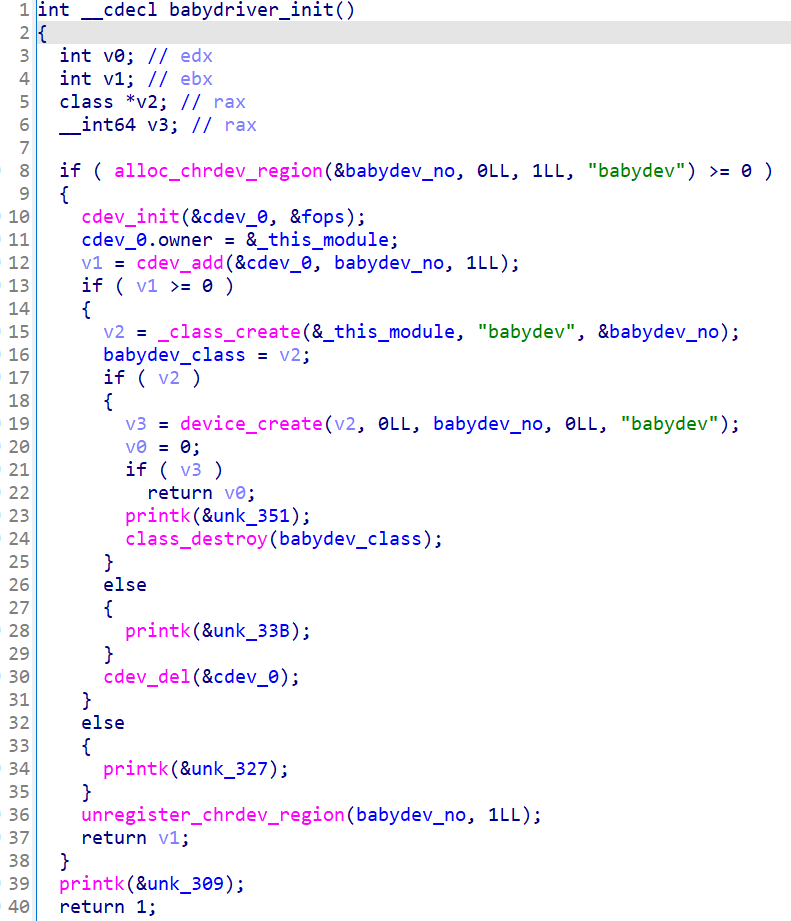
在这个init函数中,
alloc_chrdev_region用于动态分配设备编号,在fs/char_dev.c中,成功调用这个函数后babydev_no就存放设备号了1
2
3
4
5
6
7
8
9
10
11
12
13
14
15
16
17
18
19
20
21/**
* alloc_chrdev_region() - register a range of char device numbers
* @dev: output parameter for first assigned number
* @baseminor: first of the requested range of minor numbers
* @count: the number of minor numbers required
* @name: the name of the associated device or driver
*
* Allocates a range of char device numbers. The major number will be
* chosen dynamically, and returned (along with the first minor number)
* in @dev. Returns zero or a negative error code.
*/
int alloc_chrdev_region(dev_t *dev, unsigned baseminor, unsigned count,
const char *name)
{
struct char_device_struct *cd;
cd = __register_chrdev_region(0, baseminor, count, name);
if (IS_ERR(cd))
return PTR_ERR(cd);
*dev = MKDEV(cd->major, cd->baseminor);
return 0;
}cdev_init函数用与绑定cdev和file_oprations之前的连接,cdev结构体的定义如下,在源码的include/linux/cdev.h中1
2
3
4
5
6
7
8struct cdev {
struct kobject kobj;
struct module *owner;
const struct file_operations *ops;
struct list_head list;
dev_t dev;
unsigned int count;
} __randomize_layout;cdev_init函数在fs/char_dev.c里面,其中file_oprations就是一个类似于虚表的东西,里面存了好多函数指针,cdev->ops = fops赋值之后这个字符设备就可以调用相关的函数了。1
2
3
4
5
6
7
8
9
10
11
12
13
14
15/**
* cdev_init() - initialize a cdev structure
* @cdev: the structure to initialize
* @fops: the file_operations for this device
*
* Initializes @cdev, remembering @fops, making it ready to add to the
* system with cdev_add().
*/
void cdev_init(struct cdev *cdev, const struct file_operations *fops)
{
memset(cdev, 0, sizeof *cdev);
INIT_LIST_HEAD(&cdev->list);
kobject_init(&cdev->kobj, &ktype_cdev_default);
cdev->ops = fops;
}cdev_add函数同样在fs/char_dev.c里面,简单理解它就是完成了cdev和设备号之间的绑定1
2
3
4
5
6
7
8
9
10
11
12
13
14
15
16int cdev_add(struct cdev *p, dev_t dev, unsigned count)
{
int error;
p->dev = dev;
p->count = count;
error = kobj_map(cdev_map, dev, count, NULL,
exact_match, exact_lock, p);
if (error)
return error;
kobject_get(p->kobj.parent);
return 0;
}也就是说
cdev_init建立了字符设备cdev和file_operations之间的联系,cdev_add建立字符设备cdev和设备号的联系,那么这两个函数调用完,从cdev到file_operations及到设备号的联系就建立起来了,所以在内核中有设备号就能找到cdev,有cdev就能找到file_operations。_class_create创建一个设备节点,返回相应的class,再调用device_create注册这个设备节点。这两个函数都定义在头文件
include/linux/device.h中。下面引用一段话我们在刚开始写Linux设备驱动程序的时候, 很多时候都是利用mknod命令手动创建设备节点,实际上Linux内核为我们提供了一组函数,可以用来在模块加载的时候自动在/dev目录下创建相应设 备节点,并在卸载模块时删除该节点,当然前提条件是用户空间移植了udev。
内核中定义了struct class结构体,顾名思义,一个struct class结构体类型变量对应一个类, 内核同时提供了class_create(…)函数,可以用它来创建一个类,这个类存放于sysfs下面,一旦创建好了这个类,再调用 device_create(…)函数来在/dev目录下创建相应的设备节点。这样,加载模块的时候,用户空间中的udev会自动响应 device_create(…)函数,去/sysfs下寻找对应的类从而创建设备节点。
每个地方失败都会有回滚操作(destroy或者unregister)
babydriver_exit
exit函数就跟init函数正好相反,你注册,我就卸载,看函数名字也能看出来它是设备卸载时候会调用的,会把分配的设备和class等回收

babyopen
open函数的参数有inode和filp,每一个设备都会对应一个inode,而且是共享一个inode,这个不像filp文件指针每次打开一个设备都会创建一个新的文件指针以供操作(内核里的文件指针,跟用户态不一样)

babyread
read函数是从内核往用户态读数据,kernel里的文件结构体定义了一组基础接口,允许开发者按照参数的标准实现一套自己的函数,read write open release(close)都是自己实现的,这里的read判断babydev_struct.device_buf不为NULL就将用户输入的第三个参数length长的数据从device_buf拷贝到Buffer里
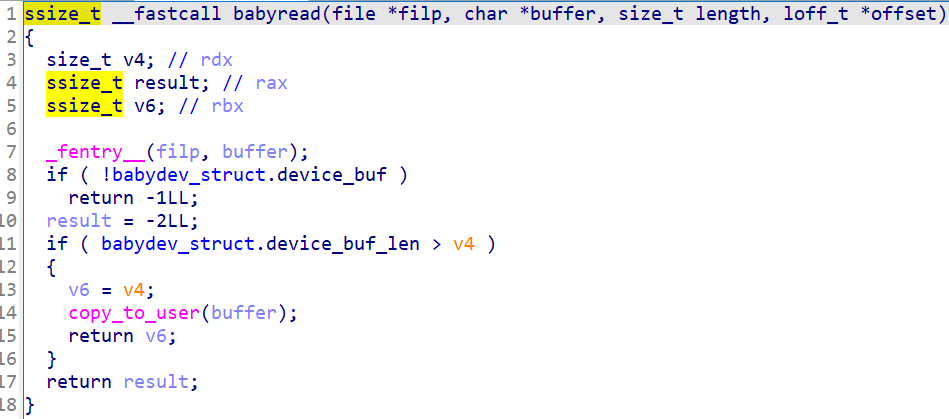
其实babyread和babywrite中实现了常规的copy_from_user和copy_to_user,限制了读取大小最多为babydev_struct.device_buf_len。
babyioctl
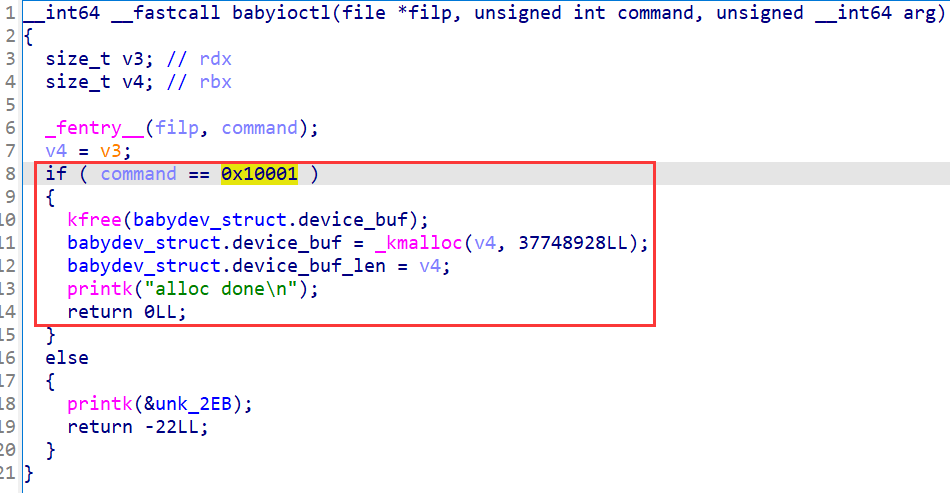
ioctl是最简单的和设备通信的方式,开发者可以在其中根据arg参数决定对设备不同的操作,在babyioctl中存在一个指令0x10001,这个指令可以重新制定堆块大小,将原有的内存释放,重新申请新的堆空间。
babyrelease
release函数调用发生在关闭设备文件的时候,这里会free掉buf

漏洞分析
这里的漏洞是因为在驱动中没有处理好并发,全局变量在两次打开设备文件的时候是共享的,当对同一文件打开多次时,babydev_struct.device_buf会被不断覆写,而在babyrelease时,会释放掉全部文件共享的缓冲区。而由于存在设置大小的函数,从而可以造成任意大小堆块的UAF漏洞。
漏洞利用
思路一
我们有了uaf漏洞,如果使某个进程的cred结构体被放进这个UAF的空间,然后通过write把uid覆写为0,就可以提权了,关于cred结构体可用参考这里。那么如何控制cred结构?我们首先通过ioctl改变大小,使得buf和cred结构大小一样,接下来只需要在触发UAF的时候新建一个cred结构,新建的cred结构就很有可能被放进这个UAF的空间里,新建进程的时候就会涉及cred结构体的申请,那么fork就解决了
调试过程
查看一下驱动,只有NX保护打开了

打包脚本pack.sh
1 | |
qemu启动脚本start.sh
1 | |
init启动脚本
1 | |
gdb调试脚本
vmlinux-to-elf工具可用从内核中提取到带符号的vmlinux
1 | |
1 | |
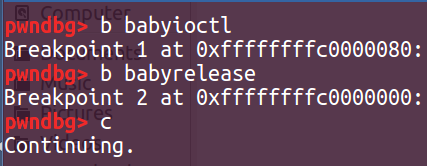
启动内核之后再运行gdb调试脚本,先下两个断点,再按c
然后再运行exp
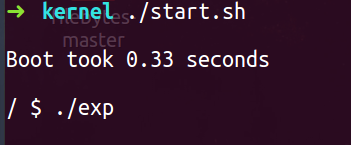
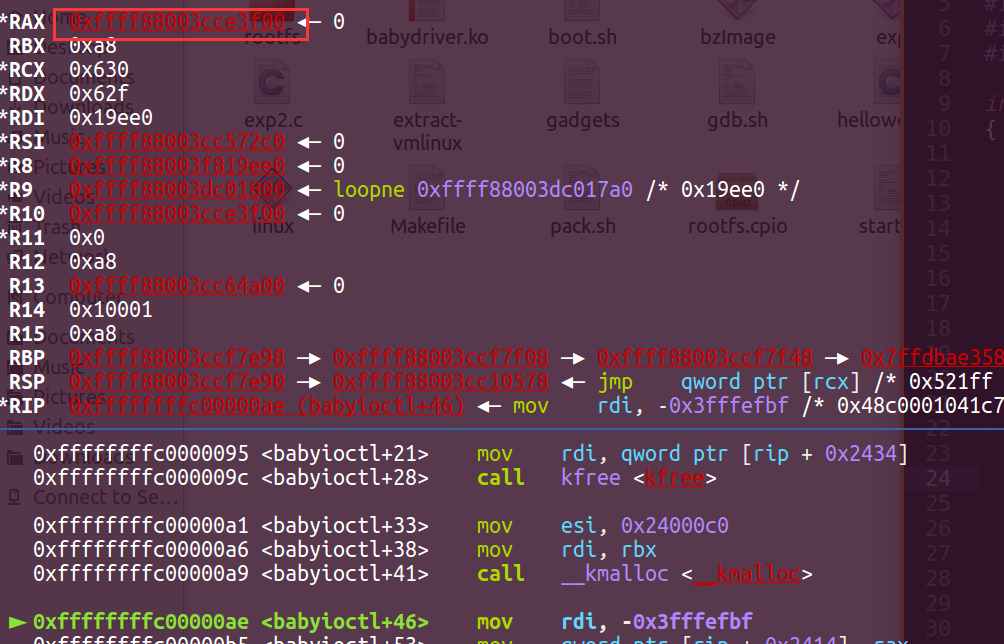
这样就可以断下来了,在kmalloc函数前停一下,rdi是0xa8正好是cred结构体的大小,同时注意他执行完的返回值rax为0xffff88003cce3f00,那么这个地址大概就相当于用户态执行完malloc返回的堆地址(现在对内核中的内存不配还不是很熟悉,只能根据用户态的思维来猜测了)。

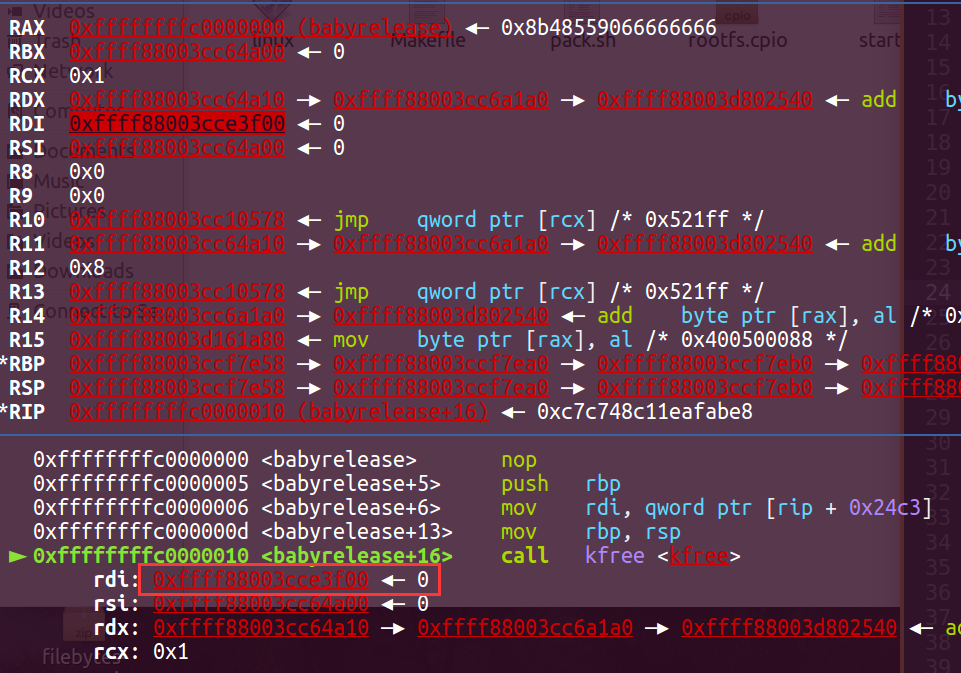
然后按c,运行到babyrelease函数,在kfree那里停一下,观察rdi,发现也是0xffff88003cce3f00,用户态free的第一个参数也是堆块地址,free掉之后那么这段内存区域应该就是空闲的了,然后下次如果需要分配和0xa8大小相近的内存内核就有可能把这个空闲的堆块继续分配出去。
按照exp的流程,程序马上就要执行fork了,用户态的fork函数最终会调用内核里的do_fork,在do_fork函数里调用copy_process函数来创建子进程的进程描述符以及相关的数据结构。这个函数代码量很多,也比较复杂,就不多说了(贴个链接感兴趣的可以看看)。fork调用流程参考](https://verf1sh.github.io/2021/10/22/linux_kernel_pwn%E5%88%9D%E6%8E%A2/#%E8%BF%9B%E7%A8%8B%E6%8F%8F%E8%BF%B0%E7%AC%A6)
于是在pwndbg里面在copy_process函数下个断点,运行过去
1 | |
此时这个内存地址还啥内容都没有
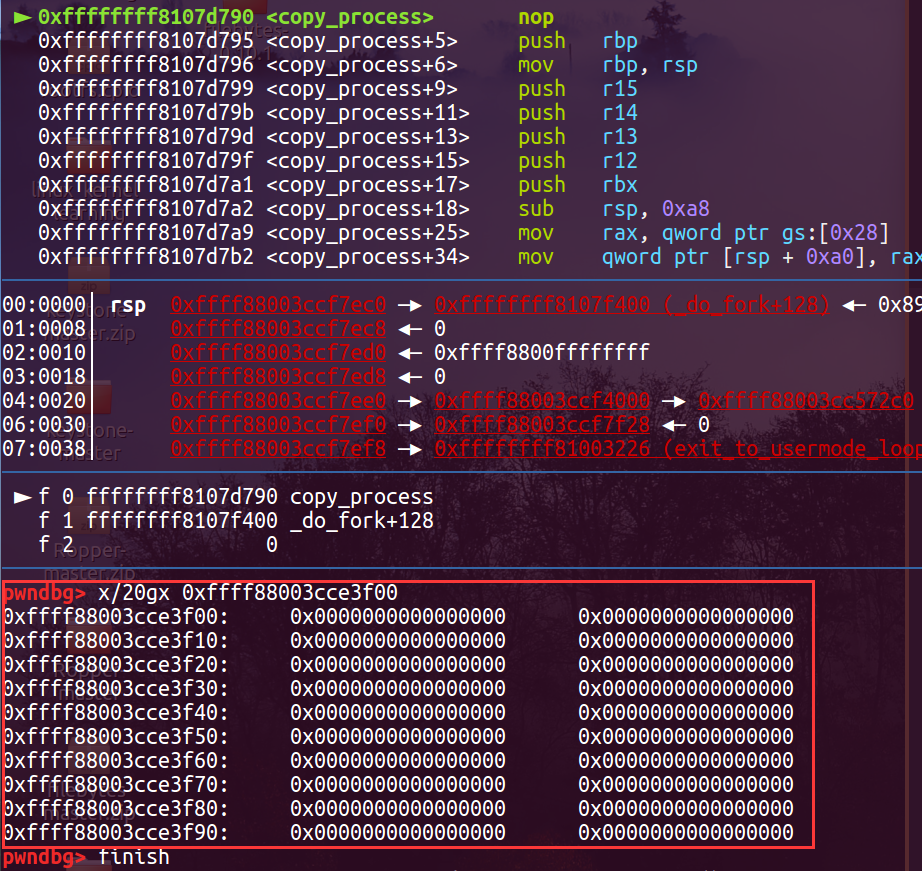
那么我们就再finish指令执行完copy_process函数,这时可以看到,这个内存地址里多了很多内容
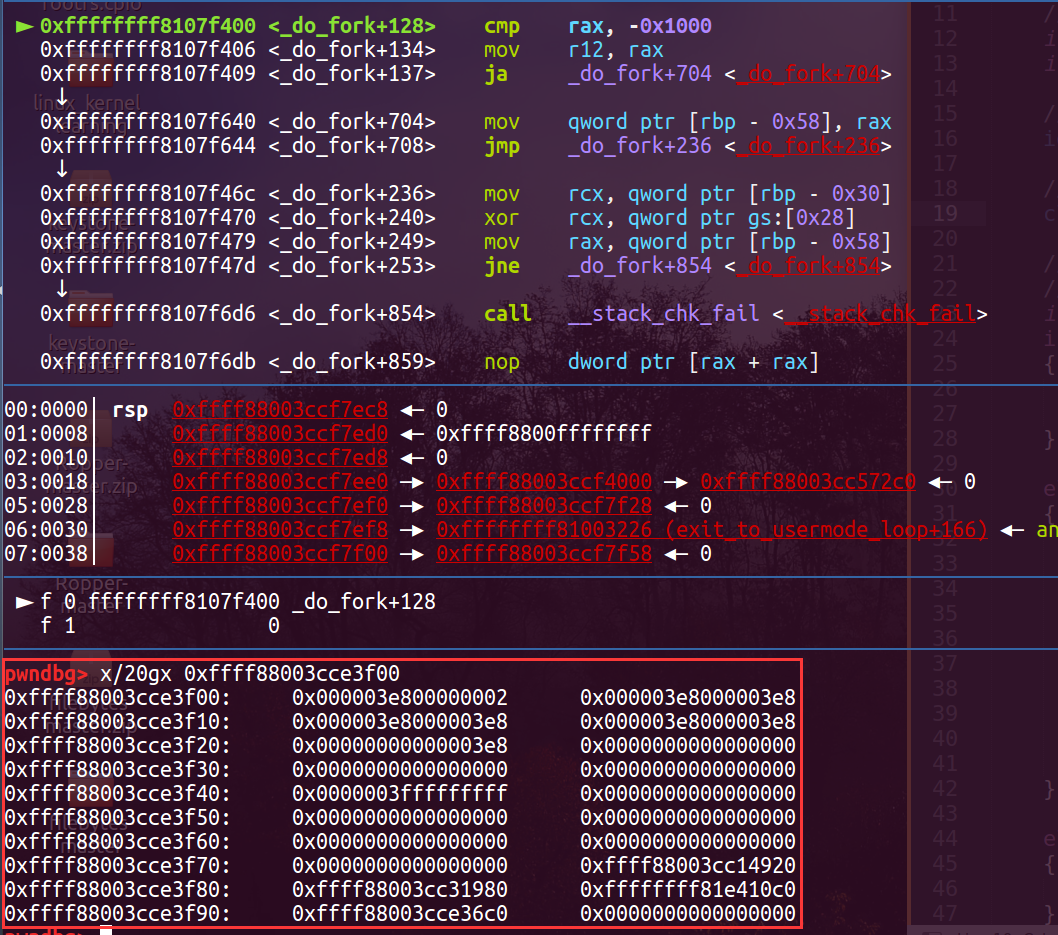
若前面的都没错,那么再调用babywrite函数的时候,我们就有机会对cred进行写操作了,下个断点
1 | |

马上就要执行_copy_from_user函数了,rsi就是我们exp里定义的zeros数组地址,初始化了28个0,那么就看看这个函数执行完之后,内存地址是啥样的。3*8+4正好是28个0。

最后执行完用户态的system(“/bin/sh”)就有了root的shell了
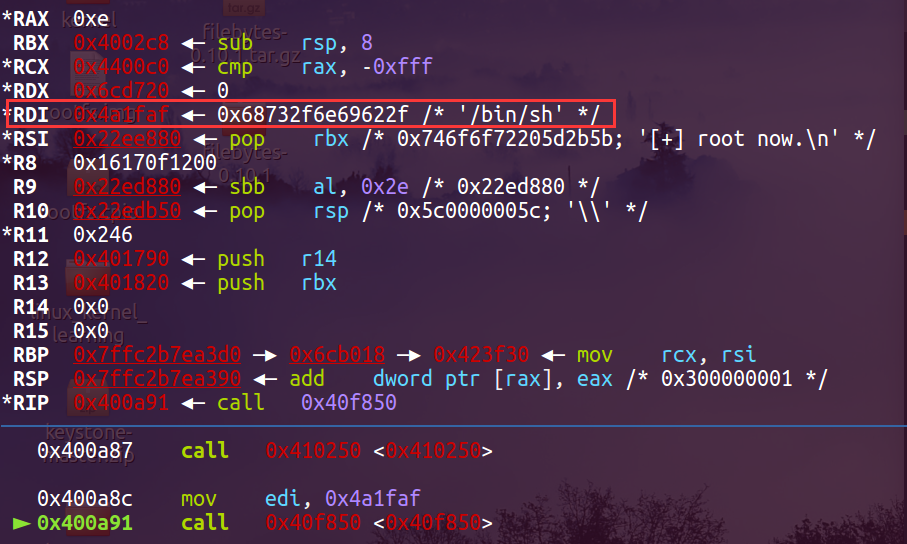
exp
1 | |
参考链接
https://mp.weixin.qq.com/s/HdXa20H57rBki5_K_ex67A
https://www.anquanke.com/post/id/255884
本博客所有文章除特别声明外,均采用 CC BY-SA 4.0 协议 ,转载请注明出处!