最近带着师弟师妹入坑二进制,先是环境搭建,以下是详细步骤。
安装虚拟机
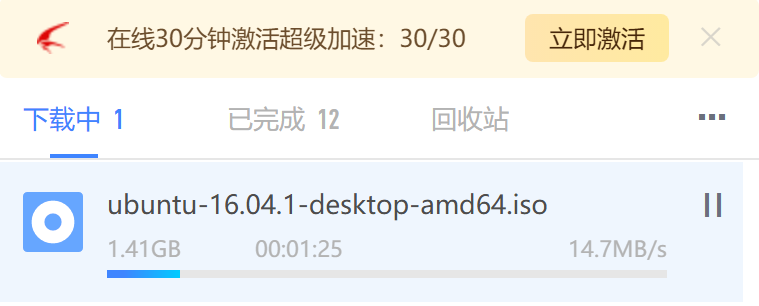
新手建议以ubuntu 16.04的虚拟机入门,https://mirrors.aliyun.com/oldubuntu-releases/releases/16.04.1/ubuntu-16.04.1-server-amd64.iso
迅雷没开会员下载速度也还可以。

虚拟机下载完成后就可以安装了,我这里使用的是VMware。VMware新建虚拟机就不细说了,网上有很多详细步骤。
1
| sudo apt-get install open-vm-tools-desktop fuse
|
换源
1
| sudo vim /etc/apt/sources.list
|
1
2
3
4
5
6
7
8
9
10
11
12
13
|
deb http://mirrors.tuna.tsinghua.edu.cn/ubuntu/ xenial main restricted universe multiverse
deb http://mirrors.tuna.tsinghua.edu.cn/ubuntu/ xenial-updates main restricted universe multiverse
deb http://mirrors.tuna.tsinghua.edu.cn/ubuntu/ xenial-backports main restricted universe multiverse
deb http://mirrors.tuna.tsinghua.edu.cn/ubuntu/ xenial-security main restricted universe multiverse
|
安装pip
1
2
3
| wget https://bootstrap.pypa.io/pip/2.7/get-pip.py
sudo python get-pip.py
sudo python3 get-pip.py
|
pip换源
1
2
| mkdir ~/.pip
vim ~/.pip/pip.conf
|
1
2
| [global]
index-url = https://pypi.tuna.tsinghua.edu.cn/simple
|
gdb插件联合使用
下载
若虚拟机git下载连接超时就,本机下载然后复制进虚拟机
1
2
3
4
| sudo apt install git
git clone https://github.com/scwuaptx/Pwngdb.git
git clone https://github.com/longld/peda.git
git clone https://github.com/pwndbg/pwndbg
|
配置
先安装pwndbg
执行setup时可能会出现异常,报错如下:
/bin/bash^M: bad interpreter: No such file or directory
这个报错可以使用如下命令进行修复:sed -i -e 's/\r$//' setup.sh
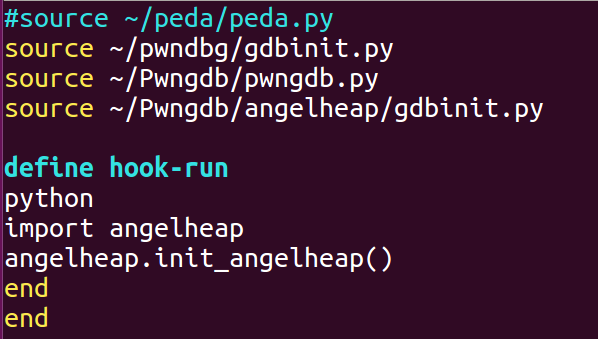
再配置下Pwngdb
1
2
3
| cd ~
cp ~/Pwngdb/.gdbinit ~/
vim ~/.gdbinit
|
1
2
3
4
5
6
7
8
9
10
11
|
source ~/pwndbg/gdbinit.py
source ~/Pwngdb/pwngdb.py
source ~/Pwngdb/angelheap/gdbinit.py
define hook-run
python
import angelheap
angelheap.init_angelheap()
end
end
|

安装one_gadget
1
2
3
4
5
6
| sudo apt-get install --reinstall ca-certificates
sudo add-apt-repository ppa:brightbox/ruby-ng
sudo apt-get update
sudo apt-get install ruby2.6 ruby2.6-dev
sudo apt-get install gem -y
sudo gem install one_gadget
|
安装32位库
不安装这个的话,32位的程序运行可能出问题
1
2
| sudo apt-get install lib32ncurses5
sudo apt-get install lib32z1
|
安装 LibcSearcher
附带两个在线查询libc版本的网站:
libc database search
异构libc database search
1
| pip install LibcSearcher
|
查看程序沙箱规则
1
| sudo gem install seccomp-tools
|
用法: seccomp-tools dump ./bin
安装zsh和oh-my-zsh
安装zsh
1
2
3
| sudo apt-get install zsh
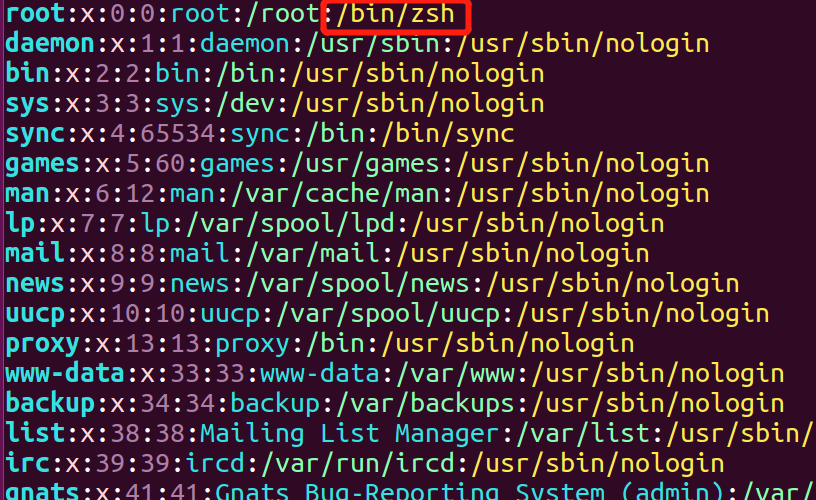
chsh -s /bin/zsh
sudo vim /etc/passwd
|

安装oh-my-zsh
1
| sh -c "$(curl -fsSL https://gitee.com/mirrors/oh-my-zsh/raw/master/tools/install.sh)"
|
安装autojump自动跳转插件
1
2
3
4
5
6
| sudo apt-get install autojump
vim ~/.zshrc
. /usr/share/autojump/autojump.sh
source ~/.zshrc
|
安装zsh-syntax-highlighting语法高亮插件
1
2
3
4
| git clone https://github.com/zsh-users/zsh-autosuggestions ~/.oh-my-zsh/custom/plugins/zsh-autosuggestions
git clone https://github.com/zsh-users/zsh-syntax-highlighting.git ~/.oh-my-zsh/custom/plugins/zsh-syntax-highlighting
echo "source ${(q-)PWD}/zsh-syntax-highlighting/zsh-syntax-highlighting.zsh" >> ${ZDOTDIR:-$HOME}/.zshrc
source ~/.zshrc
|
安装sublime
最后安装个sublime(安装失败)写exp吧,vscode其实也可以。
1
2
3
| sudo add-apt-repository ppa:webupd8team/sublime-text-3
sudo apt-get update
sudo apt-get install sublime-text-installer
|
vscode安装
1
2
3
4
5
| sudo apt install software-properties-common apt-transport-https
wget -q https://packages.microsoft.com/keys/microsoft.asc -O- | sudo apt-key add -
sudo add-apt-repository "deb [arch=amd64] https://packages.microsoft.com/repos/vscode stable main"
sudo apt update
sudo apt install code
|
大功告成,初步就这样了,以后需要什么就下载什么


